
It is finally oven weather!! I don’t know about you, but baking anything in the oven during the summer makes my entire apartment turn into an inferno. I avoid the oven temperatures by sticking to stove top and cold meals during those months. When it finally cools down I can bake, roast, and broil all day with no complaints. This is why a classic oven roasted chicken is perfect for the colder months.
When using the oven, I don’t even turn on our heating system. Our apartment’s oven is horrible at containing heat, so within a few minutes all the rooms are nice and toasty.
This Chicken is the Perfect Meal to Warm You Up During Fall and Winter
Like so many before me, my earliest childhood memories are with my family in the kitchen. When young, I stayed underfoot (though some would argue that I still tend to be) waiting to be handed a tidbit to taste here, be asked to help with a little task there, or just talking everyone’s ears off. It is through my parents that I learned how to be in the kitchen, and I can only hope to mimic the quality of food they continuously produce.
When my father is cooking, the results are a fabulous dinner and a HUGE mess to clean up. My father is a natural born cook. To him, the engineer, cooking is nothing more than a science experiment. If you put the right ratios of this and that into the mix, the end result will be nothing less than spectacular. The only setback is that when he walks out with his masterpiece in hand, he leaves a trail of scraps, supplies, and endless amounts of dirty dishes behind him.
My mother’s cooking is not a God given gift. Instead, she gained her talents through hard work and a dedication to learning the art of cooking and eating. Because it is learned, without intense concentration a mistake is bound to happen. If she is distracted an error often does occur. To help keep herself organized, my mother cannot start cooking until everything is completely clean, the ingredients are pre-measured in bowls, and everyone is quiet, so she can concentrate.
I would like to think I have the best qualities of both parents, the ingenuity of my father with the patiently pristine habits of my mother. However, each one tells me I’m more like the other every time I play their sous-chef.
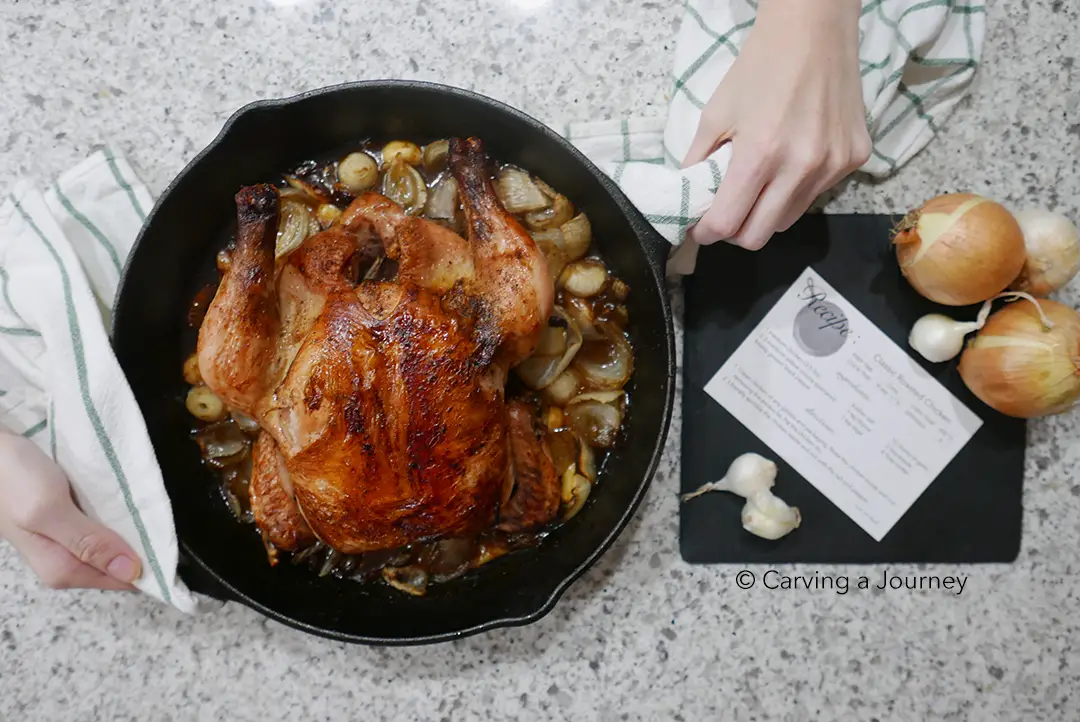
Classic oven roasted chicken is my mother’s family comfort food. She refined the recipe over the years. Now, she has passed onto my sister and me. It is easy to cook and easy to clean up, taking no time to get into the oven. Adapted from Craig Claiborne’s roasted chicken, she made it her own. Whether you are cooking for yourself, your family, or friends, this recipe is a crowd pleaser, leaving the entire party satisfied and well fed. Just remember, the key to a browned and tender oven roasted chicken is the continuous turning you provide, allowing it to simmer in its own juices.
Here Hints to Getting Perfect Classic Oven Roasted Chicken:
- I believe roasted chicken cooked in a cast iron skillet is the best. Skillets are very heavy and retains heat within the metal. When you place food into the skillet, it will not cool off as much as other types of pans. This leads to food cooking at a uniformly hot temperature, leading to superior flavor. If you do not have a skillet, a roasting pan will suffice. I highly recommend getting one. I couldn’t live without mine!
- Some people say to flip the chicken, others say don’t bother. I am on the flipping side. To get that perfect crust, each side needs to have its surface exposed in the oven. Otherwise it sits in the juices and oils, unable to get nice and crispy. Flipping also keeps the bird juicy and prevents any meat drying out.
- Throw anything you want to roast with the chicken in and around the bird. I am partial to garlic and onions. Once in a while I will throw in potatoes, carrots, and/or squash. It is up to you. For this recipe. I am sticking to my typical onion and garlic combo.
- If you don’t have a thermometer, cut into the chicken breast. The fully cooked chicken’s liquid will run clear. It will not be bloody or murky. If not, it will need more time in the oven.
You can follow us at: @carvingajourney on instagram, twitter, facebook, and pinterest.
Classic Oven Roasted Chicken
6
servings15
minutes1
hour1
hour15
minutesIngredients
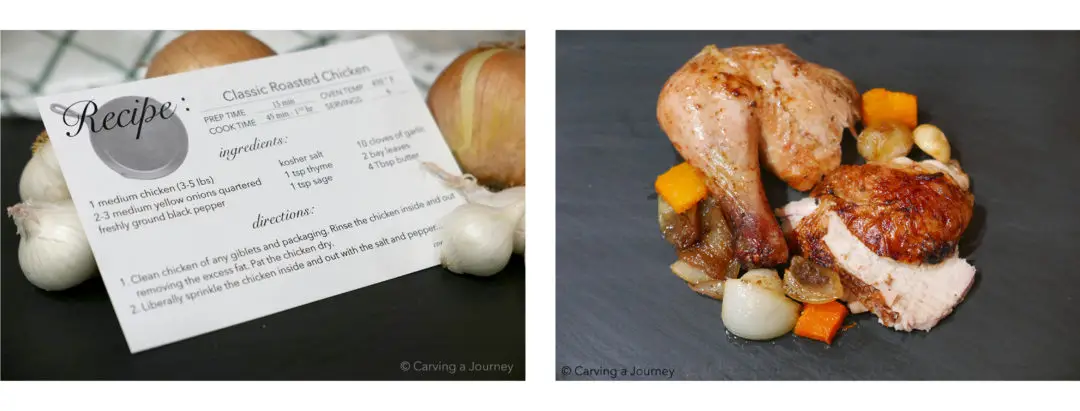
1 medium chicken (3-5 lbs)
2-3 medium yellow onions cut into quarters
10 cloves of garlic
2 bay leaves
Kosher salt
Freshly Ground Black Pepper
1 tsp of thyme
1 tsp of sage
4 tbsp of Butter
Directions
- Preheat the oven to 450 degrees F.
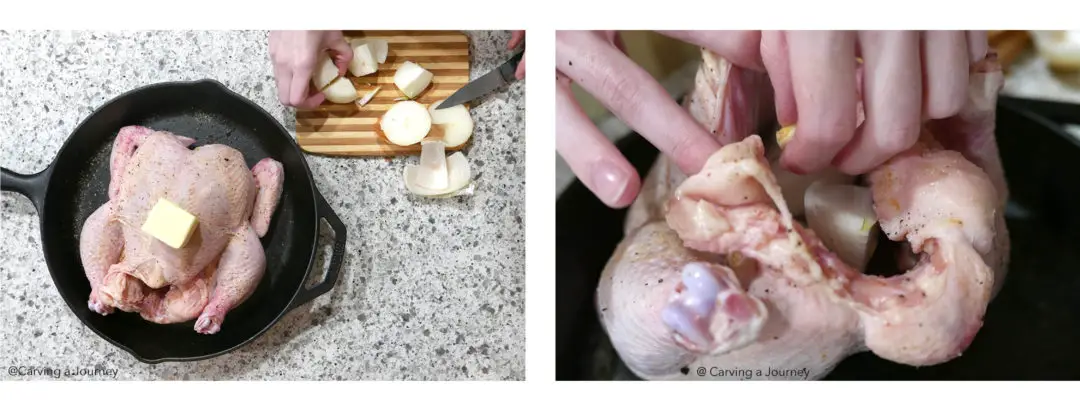
- First check the inside of the chicken for the giblets (this refers to the heart, liver, and gizzard.) Sometimes there will be a packet remaining on the inside. If there, remove the packet and throw it away. Rinse the chicken inside and out removing the excess fat. Pat the chicken dry.
- Sprinkle the chicken inside and out liberally with the salt and pepper. Stuff the cavity with one of the onions, 3 cloves of garlic, the bay leaves, half the thyme, and half the sage inside the chicken and tie the legs together with bakers twine (you can skip tying the legs if you don’t have the twine).
- Heat the butter in a large ovenproof cast iron skillet or roasting pan on the stove. Quickly turn the chicken in butter until it has coated all the sides. (For those using olive oil just coat the outside with the oil.) Do not allow the chicken to cook. Once coated, place the remaining onions and garlic around the chicken and sprinkle the remaining thyme and sage over the top.
- Place the Chicken in the oven and set the timer for 15 minutes. Once the timer runs out, take the chicken out and flip it upside down. Baste the chicken in its juices. Place the chicken back in the oven and set the timer for another 15 minutes. Repeat until the chicken is cooked through. The cooking time is between 45 minutes to 1.5 hours.
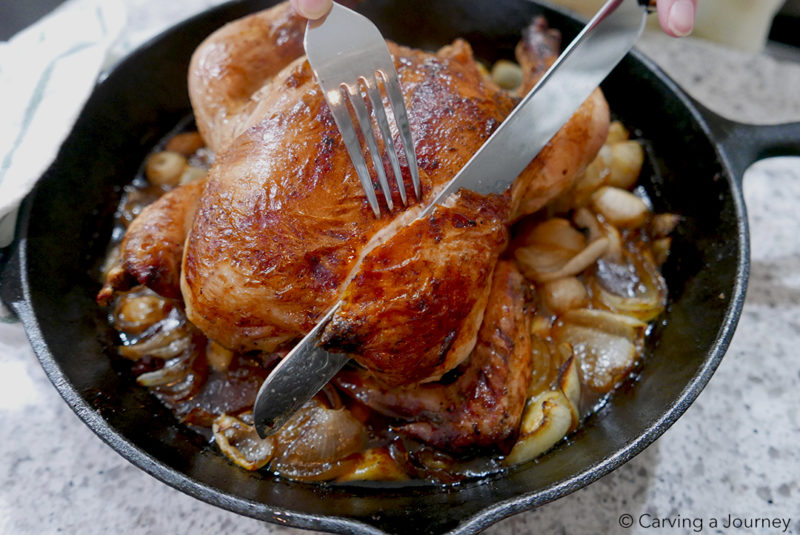
- To test the chicken, cut between the leg and thigh. If the meat is still pink, continue to cook the chicken. When the juices run clear it is done. The chicken should be 165 degrees F, when using a thermometer. (Be careful to not touch the bone with the thermometer. It will give a false reading.) Besides the chicken, the garlic and onions should be cooked down and fully roasted.
- Carve the meat and serve! Make sure to also give each plate some garlic and onions!
Did you make this recipe?
Tag @carvingajourney on Instagram and hashtag it
Like this recipe?
Follow us @carvingajourney on Pinterest
Did you make this recipe?
Follow Carving A Journey on Facebook
Carving A Journey is a participant in the Amazon Services LLC Associates Program, an affiliate advertising program designed to provide a means for sites to earn advertising fees by advertising and linking to Amazon.com. Although we may earn commissions for our endorsement, recommendation, testimonial, and/or link to any products or services from this website, these opinions are my own and I fully support these products.
2 comments
So proud! I can’t believe the photos, the food, and the clean counter!
Wow this looks so good!