
This post may contain affiliate links. Please read my disclosure for details at the bottom of this page. As an Amazon Associate, I earn from qualifying purchases on this article about easy DIY Halloween spiders. Learn about how to make Halloween spider decorations here!
It is that time of year again! Every October, I decorate my small apartment porch with homemade Halloween decorations. While I am not a craft blog, I find so much joy learning how to make a new Halloween craft, surprising the neighborhood kids with a the porch decorations, and then sharing it with my readers.
In the past, I wrote about how to make:
- Halloween-themed window silhouettes that light up during the night
- DIY condemned building Halloween decorations
Also, some further Halloween themed posts include:
- How to make drunken candy apples (alcohol-infused apples)
- A guide to picking pumpkins to use when decorating, baking, or cooking savory foods
- Fun face mask decorating to do with kids for Halloween
This year, I am going to teach you how to make the cutest easy DIY Halloween spiders. While you can make this craft on your own, you can also make it with large groups of friends and family. It is also kid-friendly!
Below, we listed all the supplies needed to make these Halloween spider decorations. Then, we give step-by-step instructions on how to make these cute little critters. If you have any questions, feel free to comment below or email us at [email protected].
Supplies Needed for Your DIY Halloween Spider Decorations:
Before making your critters, you must gather all of the appropriate supplies! We listed everything you need to make the spiders as well as recommendations for spider webs if you plan to make those as well.

Spiders Supplies:
For these cute little spiders, we recommend buying:
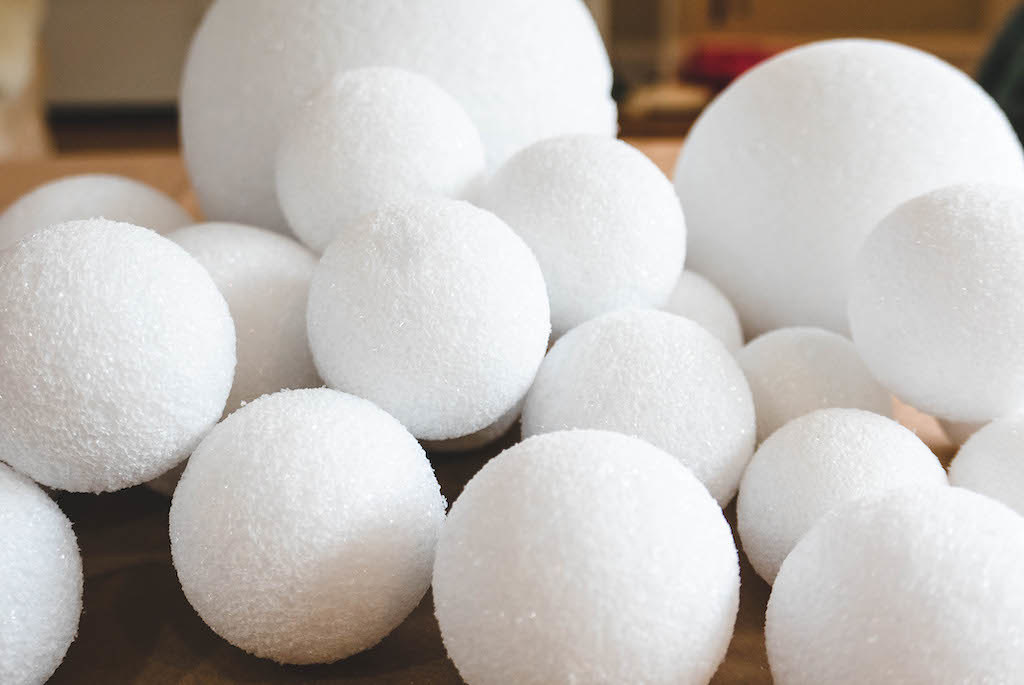
- Styrofoam Balls of Different Sizes: You need at least two sizes. Each spider requires two styrofoam balls to make the head and body. I prefer using the one’s with texture. The smooth versions do not hold the paint and glitter as well. If you do not want to use styrofoam, you can make balls from paper mache.
- Black Acrylic Paint: For this project, you use black paint to completely cover the styrofoam balls.
- Glue: After painting the balls black and letting them dry. You then add a layer of glue over the paint. I made a mixture of 50% water and 50% glue to easily paint the glue over the entire surface.
- Glitter: Once covering the balls in glue, you cover them in glitter. I used a combination of black, gold, and orange glitter.
- Disposable Paint Brushes: To use when covering the styrofoam balls with black paint and glue.
- Wooden Toothpicks or Short Skewers: To hold the balls while you paint. I prefer 4-inch skewers!
- Black Pipe Cleaners: For the spider’s legs and pincers.
- Optional Googly Eyes: You can use the googly eyes for the spiders. Nowadays, they even make some that glow in the dark.
- Optional Glow-in-the-Dark Elmer’s Glue: This glue allows your spiders to light up in the dark making them a bit scary!
Spider Web Supplies:
Further, if you would like to make spider webs, I recommend using:
- Large Cheesecloth: You can rip and shape the cheesecloth into scary-looking spider webs.
- Beef Netting: You can make similar-looking spider webs from beef netting.
- Cut Burlap and String: Finally, you can paint and cut spider web shapes from burlap. This material is very sturdy and can withstand spills, weather, and more. Further, you can use string as well.
Now that we listed all the materials, let’s learn how to make these cute DIY Halloween critters!
How to Make Halloween Spider Decorations:
Step 1: Prepare your area and supplies. For this craft, you will use paint, glue, and glitter. I recommend preparing an area with paper to keep your house clean. In the photos, I used cut grocery store paper bags as my surface cover. I also placed some on the ground and under all the craft supplies. If you need to, tape the craft cover to your table.


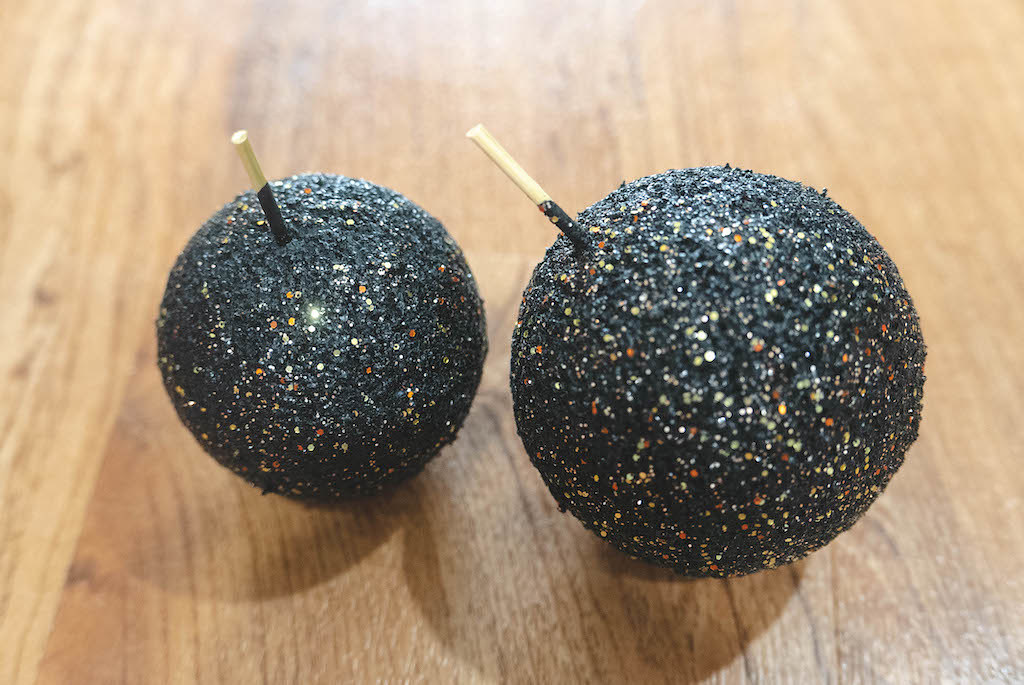
Step 2: Using a long toothpick or skewer, pierce into the styrofoam balls. You can hold this toothpick as you paint the balls to protect your hands.

Step 3: Paint the styrofoam balls black. Then, let them sit to dry. I used a leftover styrofoam board from last year’s project to hold the balls.

Step 4: Mix 50% Elmer’s glue with 50% water. At the same time, mix your glitter. Then, one at a time, using a paintbrush, cover the balls with glue and then with glitter. Once again, let them dry. (Quick Hint: Always work with glitter in a plastic or cardboard box. This way, you can collect all the glitter without it getting all over your surface area or house.)
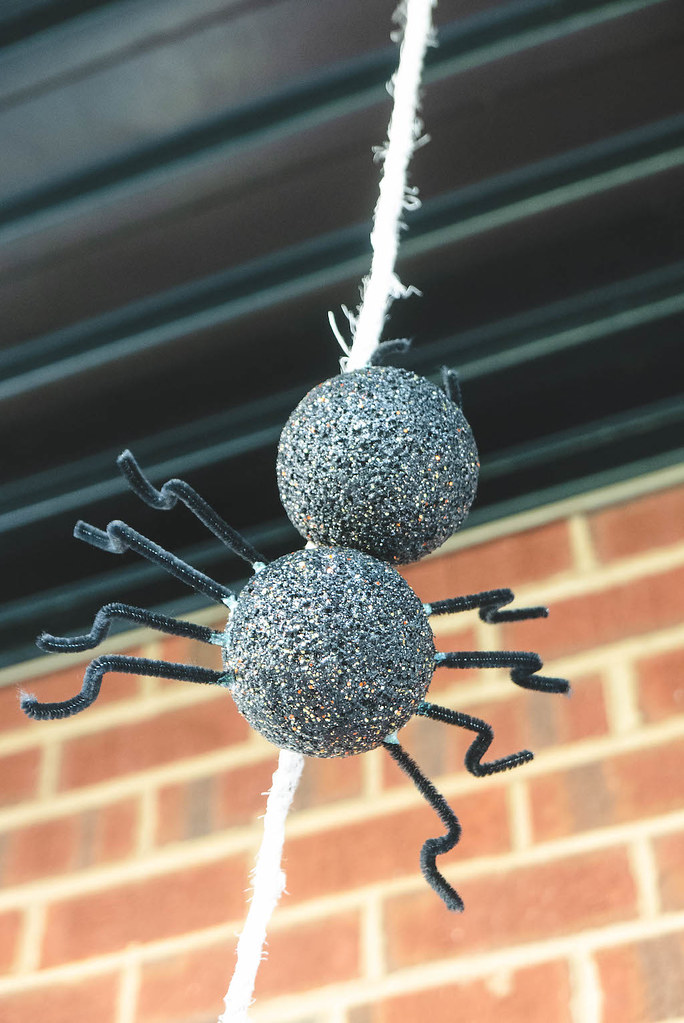
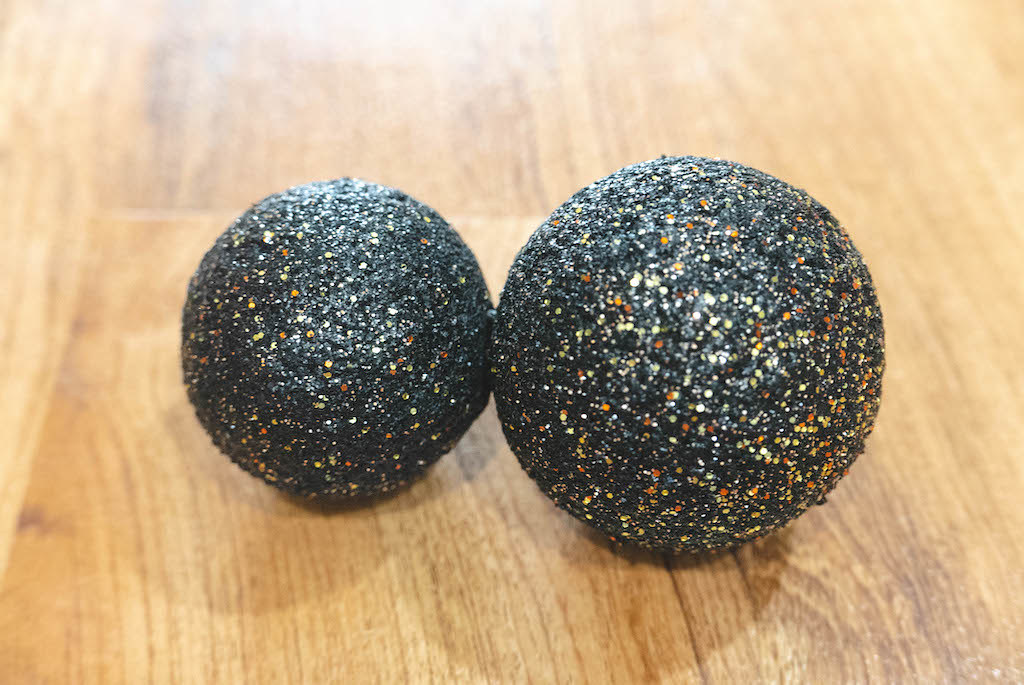
Step 5: Once the glitter dries, attach two different-sized balls using the skewers.
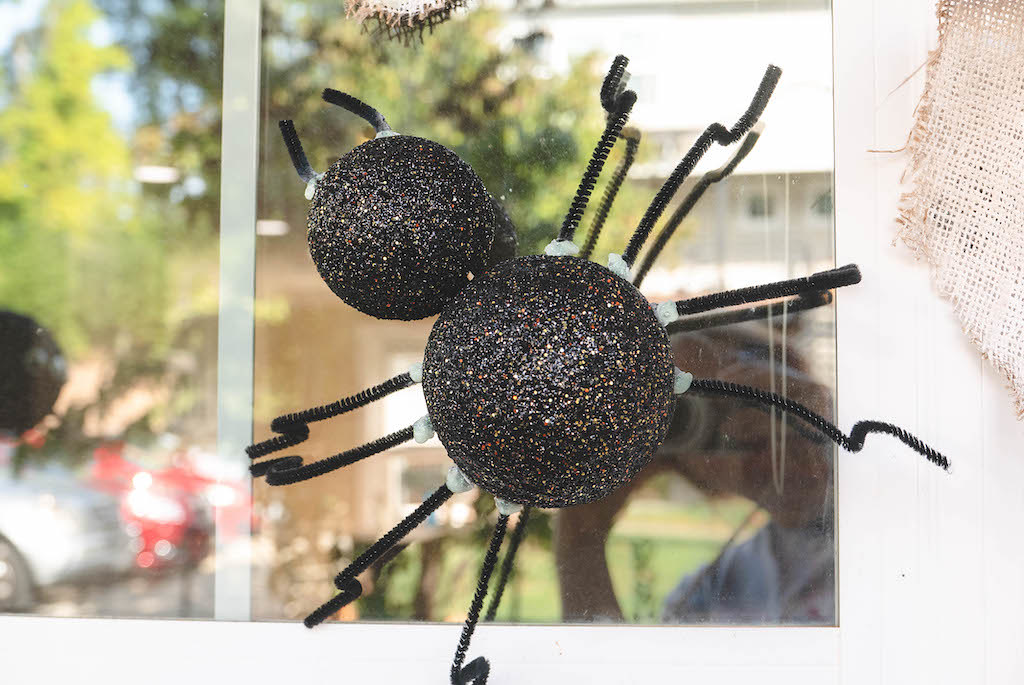
Step 6: Using the black pipe cleaners, make the spider legs and pincers. I recommend cutting the spider legs and pincers to the preferred length. Then, you can stick them into the styrofoam balls. Remember that spiders have 8 legs!
Step 7: Glue the optional googly eyes to the spider. Also, use the optional glow-in-the-dark glue to create shapes on the spider’s body and legs.

In the end, you have sparkly, cute Halloween spiders. I recommend using these under the cover of a porch or inside your house. I used them for indoor and outdoor decorations!

We Hope You Enjoyed Learning How to Make Halloween Spiders!
In the end, we hope you enjoyed learning about how to make DIY Halloween spiders. If so, let us know in the comment section below. Also, how did you decorate for Halloween this year?
If you would like to read about cooking Halloween treats, you can find recipes on our blog. We listed some of our favorite Carving A Journey recipes below! For reference, many recipes are influenced by our blended Korean and Southern heritage.
Further Carving A Journey Recipes:
- Drunken Candy Apples (Alcohol-Infused Candy Apples)
- Dehydrated Fruit for Mulled Wine and Cider (Perfect for a Halloween Party)
- Tempered Chocolate Halloween Treats & Decorations
If you have any questions or comments, you can also email us at [email protected].
And, finally, we would love to hear from you through our social media as well! You can follow us at @carvingajourney on Instagram, Twitter, Facebook, and Pinterest. Or, if you would like more articles like these, you can subscribe to our blog by joining our mailing list. We hope you enjoyed learning about how to make cute DIY Halloween spider decorations! Thank you so much for stopping by!

Carving A Journey is a participant in the Amazon Services LLC Associates Program, an affiliate advertising program designed to provide a means for sites to earn advertising fees by advertising and linking to Amazon.com. Although we may earn commissions for our endorsement, recommendation, testimonial, and/or link to any products or services from this website, these opinions are my own and I fully support these products.