
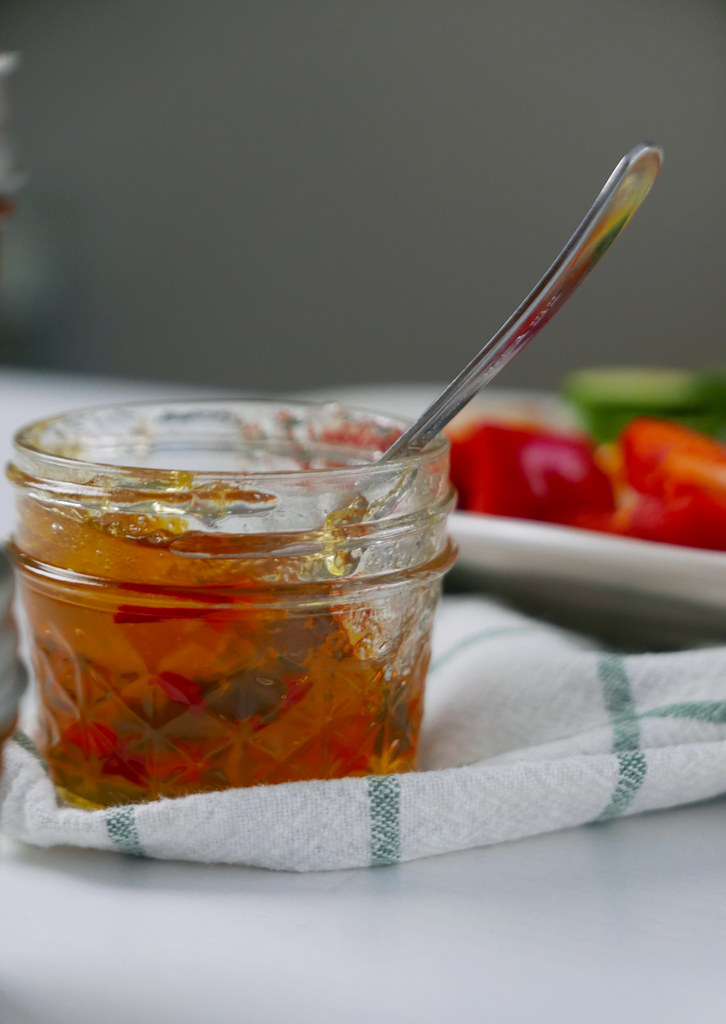
Every year, our southern family holds a tradition of eating hot pepper jelly during the holiday season! Created in Texas during the 1970s, hot pepper jelly gained momentum in popularity until it became a favorite in most, if not all, southern homes. At least that is the case amongst our family and friends. As we get into this post, we will teach you how to make our hot pepper jelly recipe, some information about canning and jarring safety, and common uses for hot pepper jelly. We hope you enjoy all the included information!

Hot Pepper Jelly Ingredients
Making hot pepper jelly, though a bit time consuming, is incredibly easy. You only need a few ingredients to get started:
- Bell Peppers: Peppers are the base ingredient of hot pepper jelly. You can use any color of bell pepper for your recipe. For this post, we used equal parts red, green, and yellow peppers. If you want entirely red-colored hot pepper jelly, stick to the orange, red, and yellow peppers. If you desire green looking jelly, stick to the green bell peppers. We like to add different colors because it is a bit more festive!
- Hot Pepper: Depending on your preferred spice level, you can use different types of hot pepper. The most common (and original) version of hot pepper jelly uses jalapeño. Thus, we used jalapeño in this recipe. If you like a little extra heat, try adding some hotter peppers. I tried ghost pepper hot pepper jelly once–it was so delicious!
- Apple Cider Vinegar: Apple cider vinegar helps add tanginess and brightness to your jelly. Beyond helping with the flavor, apple cider vinegar does two necessary jobs in our hot pepper jelly. First, peppers innately have a low acid content, and you need acid to activate the pectin and sugar to help your jelly set firm. Second, the acidity in the vinegar helps keep the jelly safe during the canning process and while the jelly sits on your pantry shelf.
- Sugar: Sugar acts as a preservation agent when canning and jarring. Beyond that, it aids in the jelly firming process and the flavor! Without sugar, your canned product won’t be as safe, set, or sweet!

Canning Safety:
When canning and jarring, you must remember to properly sterilize your equipment. If you do not, bacteria, mold, and fungus can grow in your jars, making the content unsafe for consumption. Below are the steps necessary to sterilizing your equipment and information about properly sealing your jars:
Sterilizing Steps:
- Fill a large pot with water–the larger the better. Place the pot on the stove and bring to a rapid boil on high.
- While the water comes to a boil, prepare a clean towel on a cleared space. Note: When preparing the space, please make sure it is out of reach of small children and animals. You will use this space to place extremely hot glassware that can cause severe burning.
- Once the water is boiling, place your canning supplies in the water. You must include the lids, rims, and jars. Remember to separate the lids, rims, and jars from one another. Everything must remain completely submerged.
- Leave the jars and lids in the boiling water for 5 minutes. After 5 minutes, remove your jars from the boiling water using tongs. Do not touch them with your hands until they have ample cooling time. Place your jars onto the clean towel to dry and cool down slightly.
- Remember: Do not move off your jars from the towel or touch until you are ready to start jarring. This way, they remain sterilized.
Sealing Your Jars
After making any canned or jarred goods, you need to properly seal your jars. If you forget, then all your safety practices to sterilize them will be rendered useless. Securing your jars keeps bacteria outside from being able to enter them over time.
Once you complete your jelly and put it into your container, you will boil your entire jar one last time. The heat causes everything to expand and kill any bacteria left on the outside of the jar. Then, as the jar cools, the metal ring will close tightly around the glass container. This exercise is known as the sealing process.
As your jar cools over time, you will hear popping noises caused by the metal contracting and locking everything together in place.
Note: If you are uncertain if your jars are completely sealed after a few hours, press down on the lid. If the lid doesn’t bounce back up, we know the jar is properly secured. If your lid clicks and bounces back up, it didn’t seal properly and will need to be refrigerated.
Hot Pepper Jelly Recipe Tips
- Shelf Life: Unopened, your sealed jars of hot pepper jelly should keep for approximately two years. Once opened, refrigerate. The refrigerated jelly will keep for approximately 6 months. Note: I recommend writing the date of canning on the outside of the jar. That way, a few months and canning days later, you will know exactly when you made the batch.
- Is Your Jelly Set?: Typically, if you follow the directions exactly, your jelly should set. If you are uncertain, let your jelly slightly cool in the pot after the last step. Once cool enough to touch, stick your finger into the mixture. If it comes back together right after you pull your finger out, it needs to boil longer. Turn on the stove again and let it boil for a few more minutes. If it remains separated for a bit, it is completely set! Note: Your jelly will not look set as it boils. It needs to cool completely to fully set. Do not worry if it is a bit runny when hot.
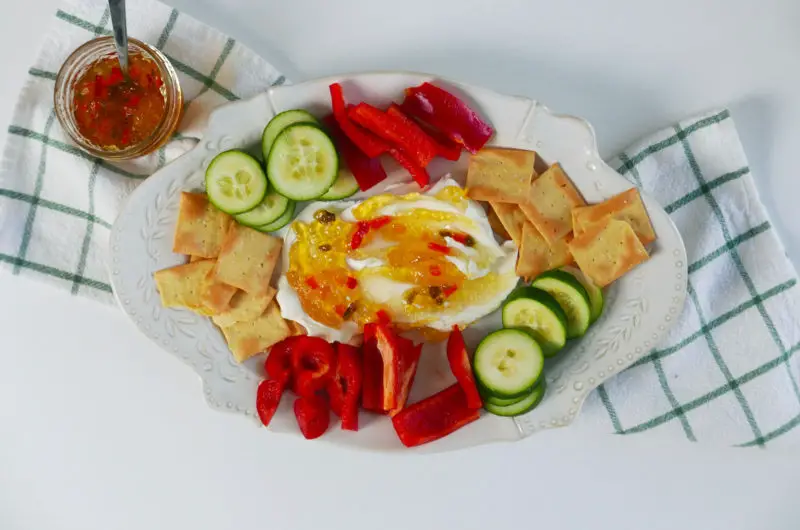
- Use Recommendations: Most southerners enjoy using hot pepper jelly as an appetizer–place hot pepper jelly on top of a block of cream cheese and serve with crackers! Also, it can be used when making dips like the one we made for our cheesy sausage balls. We also recommend using it as a glaze on meat and fish!

Do You Like Our Hot Pepper Jelly Recipe?
We hope you enjoy our hot pepper jelly recipe! If you make our recipe or have any tips, feel free to email us at [email protected] or comment below. If you liked our hot pepper jelly and want to learn more about jarring and canning try our:
- Maneul Jangajji (Korean Pickled Garlic)
- Pomegranate Jelly
- Guide to 10 Canning and Jarring Recipes We Recommend (From Ourselves and Other Bloggers)
We love hearing from you! You can follow us at @carvingajourney on Instagram, Twitter, Facebook, and Pinterest. Also, you can subscribe to our blog by joining our mailing list.
Hot Pepper Jelly Recipe
6
servings15
minutes45
minutesNote: We used 12 (4-Oz) jars when photographing our recipe! No matter what, it will equal 48 Oz!
Ingredients
1 Cup Red Bell Peppers
1 Cup Yellow or Orange Bell Peppers
1 Cup Green Bell Peppers
1 Cup Jalapeño Peppers
1 Cup Apple Cider Vinegar
1.75 Oz Pectin
5 Cups Sugar
Directions
- Sterilize jars via instructions above (body of post).
- Finely chop bell peppers and jalapeño peppers. Place in a large sauce pan over medium-high heat. As your pot heats up, mix in the apple cider vinegar and pectin.
- Stir constantly until your mixture comes to a continuous rapid and rolling boil. Let cook at a boil for 1 minute. Remove from heat.
- Once removed from heat, stir in the sugar into the pot and place back on the medium-high heat. Return to the rapid and rolling boil. Once at that state, let cook for 1-2 minutes.
- Remove from heat and skim off any excess bubbly foam that rose to the top.
- Ladle your jelly into your jars. You must fill until you reach 1/4 inch from the top of the jar. Screw on the lid caps and screw bans until they are tight.
- Place your filled jars into your canning pot filled with cool water. The water needs to be high enough to completely cover your jar. Cook on high heat until your water reaches a boil. Let your jars sit in boiling water for 5 minutes.
- Remove your jars from the water with tongs onto the clean towels. When jars have completely cooled after a few hours, press down on top of the lids. If sealed, your lids will remain flattened. If the lids spring back, the jars did not seal correctly and will need to be refrigerated.
- Enjoy! Unopened, your hot pepper jelly will keep for 2 years on your shelves. Once opened, it needs to be refrigerated and will keep in the fridge for 6 months.
Did you make this recipe?
Tag @carvingajourney on Instagram and hashtag it
Like this recipe?
Follow us @carvingajourney on Pinterest
Did you make this recipe?
Follow Carving A Journey on Facebook
Carving A Journey is a participant in the Amazon Services LLC Associates Program, an affiliate advertising program designed to provide a means for sites to earn advertising fees by advertising and linking to Amazon.com. Although we may earn commissions for our endorsement, recommendation, testimonial, and/or link to any products or services from this website, these opinions are my own and I fully support these products.
2 comments
Do you use liquid pectin? I think I only have powder.
Hi Diana! For this recipe, I used powder pectin as well. Both can work for this recipe!